There may be many times when designing a website where the client wants some custom functionality. How do you approach this with WordPress? Plugins. Plugins allow you to extend WordPress beyond the core software. The heavy customization that WordPress allows is one of the reasons why WordPress is so popular. In this guide, I will walk you through how to build a very simple plugin.
Setting Up
Installing Apache, PHP, and MySQL
We’re going to assume that you have a WordPress environment setup for development. If not, I highly recommend reading this article if you’re using Windows. Though I cannot test it, this tutorial should help you get your environment setup on Mac. Like me, if you’re using Linux, I recommend installing XAMPP as well. You could install Apache, PHP, and MySQL yourself, but XAMPP definitely speeds up the process and has less headaches. Once you have Linux installed, you may have to change the directory permission on your htdocs folder, or alternatively, your WordPress directory which I’ll walk you through downloading below.
Installing WordPress
Download WordPress from WordPress.org. Once there, simply click the blue download button, and wait for the download to finish. Then, extract the ZIP file and move it to your htdocs directory for MAMP and XAMPP, or www/html for WAMP and if you installed Apache manually.
Creating Our Files
Now that WordPress is placed in our environment, we can start adding our files. Navigate to the wp-content directory of your WordPress installation, then open the plugins folder. Inside here, let’s create the folder for our plugin. Feel free to name it anything, although lowercase letters with dashes instead of spaces would be idea. For example, instead of typing the following folder name:
My Cool Plugin
Type it as:
my-cool-plugin
This is the general convention for plugin directory names. Open this folder, then create a new file called my-cool-plugin (in the example above, it’s good practice to make it the name of your plugin.) Once you’ve typed the name of your plugin file, add a .php file extension to the end. This file will serve as the main file for your plugin.
Writing Our Plugin
Open this file up in your favorite text editor and add the following:
<?php
/*
 * Plugin Name: My Cool Plugin
 */
You can also add more information to this header comment. Here is a list of some other options you can add.
- Plugin URI
- Description
- Version
- Author
- Author URI
This text can ask users to share the post with their friends if they found it valuable.
In our plugin file, add the following code under the multi-line comment:
class My_Cool_Plugin {
    public function __construct() {
        add_action( 'the_content', array( $this, 'share_text' ) );
    }

    public function share_text( $content ) {
        return $content .= '<p>If you found this post valuable, please consider sharing it on your favorite social media platform.</p>';
    }
}

new My_Cool_Plugin();
This code helps with building a simple plugin, though understanding actions and filters will go a long way. The “Plugin Basics” guide on WordPress.org explains the basics in an easy to understand way. The long and short of it is, actions allow you to add or change functionality within a site, and filters allow you to modify the output of the web page sent to users.
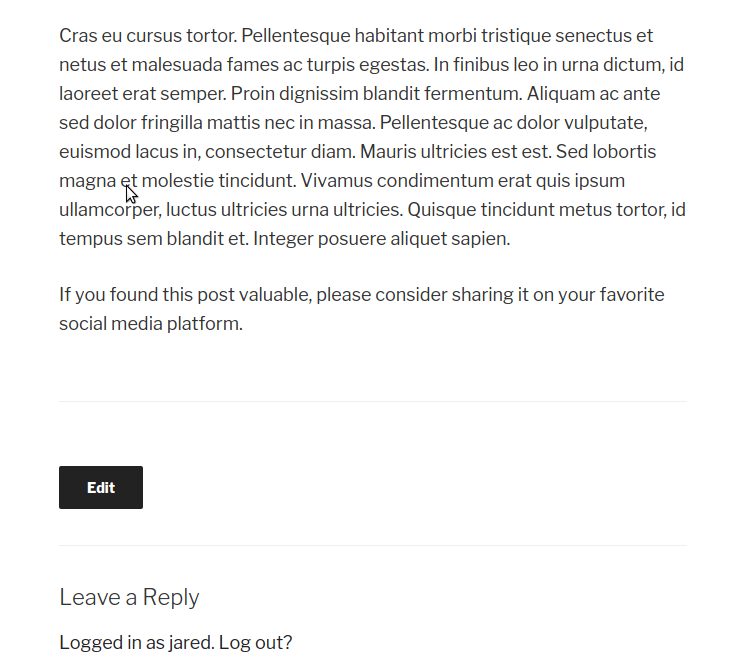
If you make a post, you should see the share message from our plugin at the bottom of the post!
Hopefully this short guide has been valuable to you. If you’d like to receive news of future tutorials and courses we write, be sure to fill out the form.